

Radon is a tasteless, colorless and odorless naturally occurring radioactive gas that seeps into a home through cracks in the foundation, gaps between joints in the wall and through other openings like sinks, floor drains and sump pumps. Radon is cancer-causing and although it is found in every state and countries around the world, the process to get rid of it is generally not difficult or expensive certainly when compared to other problems in the home.
Radon levels are measured in pico-Curies per liter (pCi/L) which is used in the US whereas Becquerel per cubic metre (Bq/m3) is used elsewhere around the world and by the World Health Organization (WHO).
A generally acceptable indoor radon level is 2.7 pCi/L or 100 Bq/m3 although standards vary by country. Around 21,000 people die every year from radon-related lung cancer in the US and 20,000 in the EU. Radon monitoring costs around $200 and radon mitigation costs around $1,200.
The WHO recommends countries use 100 Bq/m3 as the reference level but that the reference level does not exceed 300 Bq/m3. Countries have their own recommendations depending on their radon levels.
What level of radon is considered dangerous?
Depending on where you live the acceptable levels vary but the WHO recommends a generally accepted indoor level of radon is not to exceed 2.7 pCi/L or 100 Bq/m3. For reference, 1 pCi/L = 37 Bq/m3.
100 Bq/m3 is used as the reference level not to be exceeded by the WHO as well as in Canada. In the EU in general, the action level is between 200 Bq/m3 and 400 Bq/m3 depending on the country. Some countries like Germany and the Netherlands have lower radon levels than Austria and Finland for example. In the US acceptable levels are 2 pCi/L – 4 pCi/L. But even within countries, certain areas can have differing levels so it is important to treat your home individually.
The highest levels of radon are found in countries like Norway, Mexico, Sweden, Czechia, Montenegro and Albania.
Ideal indoor radon readings and detection
A radon reading of 0 is of course ideal but can be difficult if not impossible in many areas. Dealing with radon isn’t so much radon removal but rather radon mitigation: You are filtering it out of the house rather than eliminating it. In part this will depend on how expensive radon detection and mitigation is in your local area because it can be a major reason for inaction when costs are prohibitive.
Bottom line? Every house needs to be tested for radon individually because while specific geographic areas have higher radon levels than others, each home may have different abilities to introduce radon inside.
Radon level ranges and action required
While the acceptable level defined by the WHO and used in countries like Canada is 100 Bq/m3, European countries have different ranges of acceptability generally ranging between 200 Bq/m3 and 400 Bq/m3. In countries where radon levels are known to be high, local range levels may differ.
Here’s a table showing how the US treats indoor radon levels.
| Radon Level | Status | Action required |
| >4 pCi/L | Hazardous | This level requires attention from a professionally trained radon inspector. |
| 2 pCi/L – 4 pCi/L | Fair | Improve ventilation levels and keep monitoring radon levels. |
| 0 – 2 pCi/L | Good | 0 is of course the ideal number but < 2 is good. |
Why is radon dangerous?
Radon is know to cause up to 21,000 deaths in the US each year due to radon-related lung cancer and a further 20,000 deaths in the EU. Radon is found in every US state and is particularly high in Iowa and North Dakota as well as other parts of the north and northeast.
Radon is a concern in other areas of the world including Europe – Norway has particularly high levels – and is often the second largest cause of lung cancer deaths next to smoking. Smokers who live in high radon areas face a double whammy of sorts as the combined effect of smoking and radon exposure increases the chance of lung cancer significantly.
Factors that increase radon accumulation
The EPA believes that 1/15 homes in the US have high levels of radon. Many countries around the world face high radon exposure naturally, too. Factors that increase the chance that your home is accumulating a higher than recommended level of radon include the following:
- You live in an area with naturally high radon readings due to high levels of uranium, thorium, and radium in the soil.
- You have a basement or cellar, crawl space or a home built on a slab.
- Your home is well insulated which modern homes tend to be especially in colder climates. This limits air circulation.
- Your home is tightly sealed which modern homes tend to be due to innovations in window and door technology. This also limits air circulation.
- You have a sump pump in the basement or other openings such as a drain, cracks, gaps etc.
Common radon exposure symptoms
Radon is tasteless, colorless and odorless which makes it even more worrisome since it isn’t easily detected by human senses. By the time you notice you have been exposed to a high level of radon for some time, it might be in the form of lung cancer. So chances are you won’t actually notice any specific symptoms of radon per se until it’s too late.
The National Radon Defense website lists a number of common symptoms that people experience when suffering from radon-induced lung cancer.
Check out this resource from the EPA which not only shows a nationwide map of radon zones as well as a list of state radon contacts to learn more about how to deal with it before you get to the point of becoming ill.
You can also view an interactive global map to see the highest and lowest radon rates worldwide.
How to fix high radon levels in your home

The EPA suggests that the average fix for radon mitigation costs around $1,200. A common solution is shown in the picture above where a pipe vent is installed in the basement of the house on top of a gravel bed covered with polyethylene built over the foundation. This enables the gas to circulate and make its way up the pipe and safely out of the home.
For a more active solution, a fan can be built in your attic that sucks the gas up through the pipe rather than relying on the gas escaping itself. Either of these mitigation solutions would be installed by a professional radon service company that specializes in radon mitigation.
Radon levels tend to be highest in the basement or cellar since radon gas comes up from the ground. Other methods to assist radon mitigation include better ventilation through energy conservation, increasing under floor ventilation and sealing walls, floors & cracks.
It’s important to note that increasing or improving ventilation isn’t referring to a temporary solution like opening a window since once the window is closed the radon level begins to built up again. This solution specifically refers to one that enables radon gas to escape out of the home regularly and consistently without you having to do anything.
Average radon mitigation and test costs
| Expense | Cost |
| Professional radon mitigation | $1,000 – $1,200 |
| Professional radon inspection | $125 – $400 |
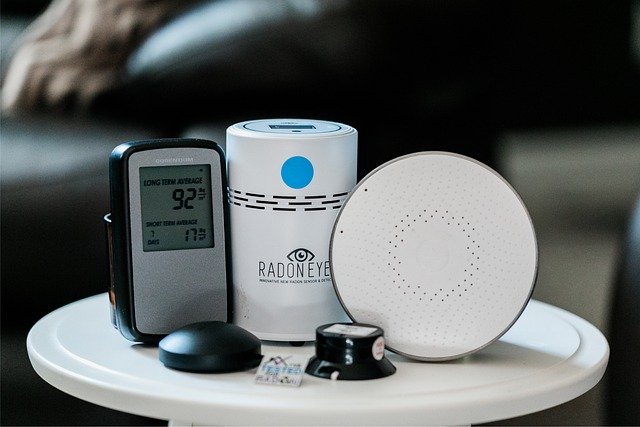
| Active radon monitor | $200 |
| Radon test with a home inspection | additional $90 – $200 |
| DIY radon charcoal test | $10 – $30 |
| Passive long-term radon test kits | $10 – $30 |
| DIY radon water testing kit | $15 – $40 |
Some radon professionals may offer radon measurement and/or radon mitigation services.
Summary
If you live in a high radon zone or would simply like to check current levels within your home to be safe, you can either pay a professional to conduct the test or start with the following process to test it yourself:
Step 1: Do a short term DIY test that typically lasts from 2 – 90 days depending on the test kit. Look for kits like the Air-Chek 3-7 Day Charcoal Radon Kit, FIRST ALERT Radon Test Kit or the ProLab Short Term Charcoal Radon Gas Test Kit among others. Other styles of test include charcoal canisters or a continuously monitoring home radon detection kit that plugs into a wall socket or uses batteries.
If the test results show an elevated level of >4 pCi/L move to step 2.
Step 2: Do a long term test to double check the results of Step 1 that lasts for at least 91 days. This includes electret ion chamber (EIC) detectors and alpha track tests that are able to test for at least 91 days.
Alternatively you can also do a second short term test to back up your results or immediately contact a radon professional to test professionally and if required offer a solution for you.
If you find you have particularly high readings from Step 1, you might as well just go straight to the professional test for quicker results and piece of mind especially as you may not pay much more for the test than buying a long term kit yourself. Licensed radon professionals use tests that typically remain in your house for 48 – 54 hours at which time they return to check the results.