

Composting with worms, also known as vermiculture, is a simple and effective way to turn your kitchen scraps and yard waste into nutrient-rich compost for your garden. Not only is it easy to set up and maintain, but it also has a number of benefits over traditional composting methods.
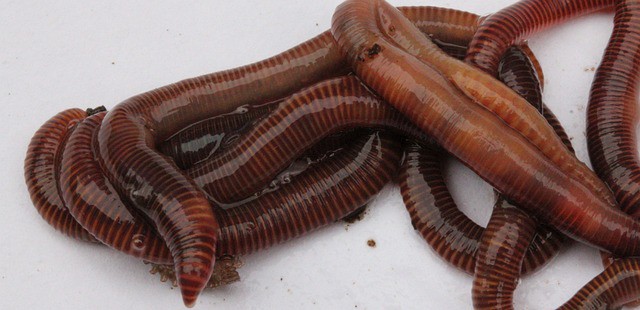
Vermicomposting uses red wiggler worms, also known as Eisenia fetida, to break down organic matter. These worms are specially adapted to eating and processing organic material and can consume up to half their weight in food per day. As they eat, they excrete nutrient-rich castings, which can be used as a soil amendment or fertilizer for your plants.
To start a vermicomposting bin, you will need a container with a tight-fitting lid, such as a plastic storage bin or a wooden box. Drill holes in the bottom and sides of the container for drainage and ventilation. Next, add a layer of bedding material, such as shredded newspaper or coconut coir, and moisten it with water. Then, add your worms and food scraps.
It is important to note that worms prefer a neutral pH environment, and also, you should avoid adding meat, dairy, or oily foods to your bin, as these can attract pests and create unpleasant odors. Instead, focus on adding fruit and vegetable scraps, coffee grounds, and crushed eggshells.
Maintaining your vermicomposting bin is relatively easy. Keep the bedding material moist, but not too wet, and add food scraps in small amounts to avoid overloading the worms. You can also periodically check the pH level of the compost and add lime or sulfur as needed.
When your compost is ready, you can harvest it by removing the worms and casting from one side of the bin and adding fresh bedding and food to the other side. The finished compost can be used as a soil amendment or fertilizer for your plants, providing them with essential nutrients for growth.
Overall, vermiculture is an easy and efficient method of composting, which produces nutrient-rich compost that can benefit your garden. It is also a great way to reduce waste and promote sustainability in your home.
Buying a vermicomposting bin
If you don’t want to make a vermicomposting bin yourself, you can buy one that is tailor made for this purpose. Here’s what to look for when shopping for one:
- Size: Consider the amount of food scraps and yard waste you generate, and choose a bin that is appropriately sized. A larger bin can accommodate more worms and more food scraps, but it will also take up more space in your home. Yes, unless otherwise mentioned, these bins are designed to be used inside your home as the worms prefer room temperature and can’t survive in cold outdoor weather. If you live in a more temperate zone, you might have instructions that allow you to keep the bin outdoors however. We’ll talk more about sizes and capacities below.
- Material: Vermicomposting bins can be made from a variety of materials, such as plastic, wood, or metal. Consider the durability and ease of cleaning of the material before making your purchase. Worms don’t like light so the bin should be at best opaque but more likely made of a material that you can’t see through.
- Ventilation: Proper ventilation is essential for the health of the worms and the success of the composting process. Look for a bin that has holes drilled in the sides and top, or has a mesh lid, to allow for air flow. The bin shouldn’t smell if you follow the instructions.
- Drainage: A bin with drainage holes in the bottom will allow excess moisture to escape, preventing the compost from becoming too wet and reducing the risk of unpleasant odors. Some bins have a spigot (tap) that you use to drain excess water that you can use to water your plants.
- Access: Some vermicomposting bins have removable trays or lids that make it easy to access the compost and harvest it when it’s ready. Consider whether you want a bin that is easy to access or one that is more enclosed.
- Additional features: Some vermicomposting bins come with additional features, such as a built-in thermometer or a moisture gauge, which can help you monitor the conditions inside the bin.
- Cost: Vermicomposting bins can vary widely in price, so be sure to consider your budget and the features you need before making a purchase.
By considering these tips, you can make an informed decision and choose a vermicomposting bin that is right for you.
What food and waste can you add to a vermicomposting bin?
Read the instructions of the models you consider and end up purchasing but in general terms, here are things you can ADD, LIMIT (small amounts) and AVOID (do not add) to your vermicomposting bin.
ADD (Add this things to your vermicomposting bin as you like)
- Vegetables
- Non-citrus fruits
- Coffee grounds
- Tea leaves
- Egg shells
- Dried leaves
- Grass
- Cardboard
- Paper
LIMIT (add these things to your vermicomposting bin but in limited amounts)
- Rice
- Bread
- Cakes
- Citrus Fruits
- Tomatoes
- Potatoes
AVOID (do not add these things to your vermicomposting bin)
- Meats
- Eggs
- Fish
- Dairy products
- Bones
- Pet waste
How much waste can a vermicomposting bin recycle each week?
An typical vermicomposting bin has 3 – 5 trays and can hold 0.25 lbs – 10 lbs of worms depending on the specs for that model. 2 lbs of worms can consume up to 1 lb of food scraps per day on average. A 5-tray worm bin that can house 10 lbs of worms can process about 5 lbs of food scraps per day.
The amount of waste that a vermicomposting bin can recycle each week can vary depending on the size of the bin and the amount of waste that is added to it along with the amount of worms working.
Additionally, the type of waste that is added to the bin can also affect how much it can recycle. For example, a bin that is primarily used for food waste will likely be able to process more waste per week than a bin that is used for yard waste.
Final thoughts
It is important to avoid adding meat, dairy, oils, and pet waste as these can attract pests, create unpleasant odors and imbalance the system.
It is also important to make sure that the waste is cut or shredded into small pieces so that the worms can easily consume it.
It is also important to maintain a balance of “browns” (carbon-rich materials like leaves, newspaper, straw) and “greens” (nitrogen-rich materials like fruit and vegetable scraps, grass clippings) in your worm bin. Too much of either can slow down the composting process.